Basic Usage
This section will guide you through the basic usage of Multiverse-Inventories, including how to create groups and shares to create separated or shared inventories between worlds.
Please read the usage instructions CAREFULLY, as incorrect configuration may lead to loss of player inventory data. It is highly recommended to BACK UP YOUR SERVER before making changes to Multiverse-Inventories configuration.
You should also make changes before players have joined the worlds you are configuring, as existing player data may be overwritten if they have existing data in those worlds.
About Default Group
When you first install Multiverse-Inventories, there will be one default group created for you called default, which has the server's default worlds (usually world, world_nether, and world_the_end) in it that shares everything. This is done to mimic the default Minecraft behavior of having the default overworld, nether, and end having common inventories. All other worlds you have created or imported will have their own separate inventories.
If that is your desired setup, then you are all set! If you need to customize which worlds are in which groups and what shares they have, read on!
To check the current configuration of the default group, you can use the /mvinv info default command.

If you do not want this default behavior, you can delete the default group with /mvinv delete-group default command and create your own groups as needed.
If you just want to another world to also share inventories with the default worlds, DO NOT create a new group. You can add that world to the default group with /mvinv add-worlds default <worldname> command.
Creating a New Group
For this guide, we will create a group for a set of smp worlds so we can share everything between them, while keeping them separate from the default worlds. Adapt the world names and shares as needed for your use case.
Step 1: Know your world names
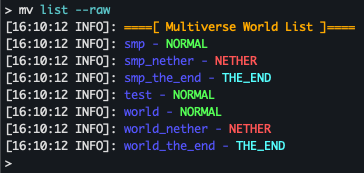
If you are unsure of your world names, you can type /mv list --raw to get a list of your worlds.
Step 2: Understand the command
Next, use the /mvinv create-group command to create a new group. Before running the command, make sure you have the following information ready:
- The name of the group you want to create (e.g.,
smpgroup). - The worlds you want to include in this group (e.g.,
smp,smp_nether,smp_the_end). - The shares you want to enable for this group (e.g.,
all,inventory,enderchest,experience,health,hunger,potion-effects).
The syntax for the command is as follows, with world names and shares separated by commas:
/mvinv create-group <group-name> <world1,world2,...> <share1,share2,...>Step 3: Applying the command
Run the command with your desired parameters. For the desired setup as detailed above, we will create a group called smpgroup that includes the worlds smp, smp_nether, and smp_the_end. For the shares, we will set all to share everything between these worlds.
/mvinv create-group smpgroup smp,smp_nether,smp_the_end all
About Shares
Generally for shares, you will want to just use all to share everything between the worlds in the group, which will separate all inventories from other worlds not in the group.
However, if you require more advanced setups, such as only sharing health and experience between worlds in the group, you can specify those shares as health,experience. In this case, the group will only have common health and experience, while other inventory aspects will remain separate even if the worlds are in the same group. For the full list of share options, see the Shares List page .
Next Steps
Now that you have created a group, you can create more groups as needed for your worlds!
Other common feature you may want to explore are:
- Enable and configure Last Location to have players remember their last location per world or group.
- View other commands in the Command Usage page , such as modifying existing groups, listing groups.